“Owning a pool is a commitment to keeping it clean and clear, but the rewards of a refreshing dip on a hot day are well worth the effort.” – Unkwon
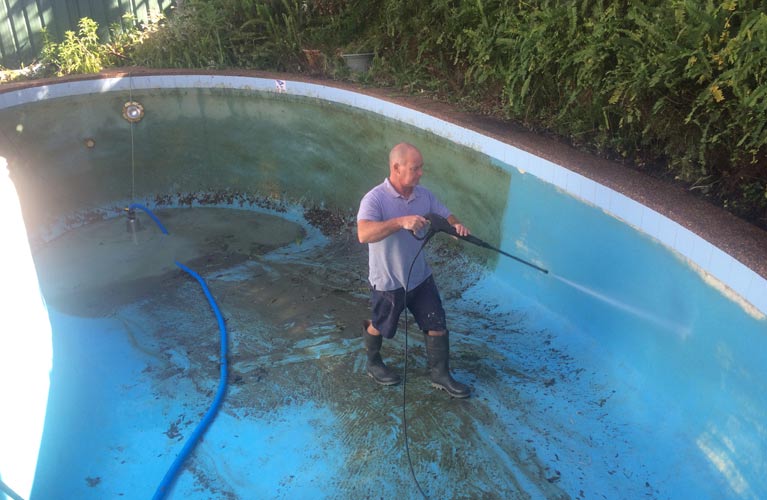
As the winter months come to an end, it’s time to start thinking about getting your swimming pool ready for the summer season. One of the most important tasks is cleaning your pool after it has been closed up for the winter.
While the thought of cleaning your pool may seem overwhelming, it’s an essential part of maintaining a safe and healthy swimming environment.
How to Clean Your Pool (Step-by-Step Guide)
Step 01: Remove Debris
Start by removing any debris that may have accumulated in your pool during the winter months. Use a leaf net or a skimmer to scoop up leaves, twigs, and other debris floating on the surface of the water. Dispose of this debris in a compost bin or a trash can.
Step 02: Drain the Water
If your pool was covered during the winter, you’d need to drain any water that may have accumulated on the cover before removing it. Use a pool cover pump or a hose to drain the water from the cover. This will prevent dirty water from entering the pool when you remove the cover.
Step 03: Remove the Cover
Carefully remove the cover from the pool, being careful not to let any debris or dirty waterfall into the pool. Fold the cover and prepare it for cleaning.
Step 04: Clean the Cover
Once the cover is removed, clean it thoroughly with a mild detergent and a soft brush. This will help remove any dirt or debris that may have accumulated on the cover during the winter months. Rinse the cover with a hose and allow it to dry completely before storing it.
Step 05: Check the Water Level
Checking the water level of a swimming pool is an important part of cleaning it. Below we noted 05 steps to check the water level of your swimming pool:
- Find the pool’s water level marker. This is usually a line on the side of the pool, typically located near the skimmer or filter system.
- Look at the water level and see if it is below or above the marker. If the water level is below the marker, you will need to add water to the pool. If the water level is above the marker, you will need to drain some of the water out.
- If you need to add water to the pool, use a garden hose to fill the pool to the appropriate level. Be sure to monitor the water level as you fill it, so you don’t overfill the pool.
- If you need to drain water from the pool, you can use a submersible pump to remove the excess water. Be sure to follow local regulations and guidelines for disposing of pool water.
- Once you have adjusted the water level, be sure to check the level again after a few hours. Water can evaporate quickly in hot weather, so you may need to add more water to maintain the appropriate level.
Step 06: Skim the Surface
:max_bytes(150000):strip_icc()/swimming-pool-skimmer-1017636468-04461c18969d475fb99c1a9fe8173424.jpg)
Use a skimmer to remove any remaining debris that may have accumulated on the surface of the water. Skim the entire surface of the pool, including the corners and the sides. To do it properly we suggest you 06 quick steps below:
- Start by selecting a skimmer net that fits your pool. The net should be large enough to cover a significant portion of the surface area of your pool.
- Attach the net to the skimmer pole. The pole should be long enough to reach the entire pool, so you can skim the entire surface without getting in the water.
- Stand at one end of the pool and extend the pole out onto the water, making sure that the net is flat on the surface of the water.
- Move the pole slowly across the surface of the water, pulling it towards you as you go. The net will collect any debris, such as leaves or insects, that are floating on the surface of the water.
- Once you have collected a significant amount of debris in the net, lift the pole out of the water and dump the debris into a trash can or compost pile.
- Continue to move the pole back and forth across the surface of the water until you have skimmed the entire pool.
- Finally, remove any debris that has been collected in the skimmer basket of your pool’s filtration system. This will help keep the water in your pool clean and clear.
Step 07: Brush the Walls and Floor

- Start by selecting a pool brush that is appropriate for the surface of your pool. There are different types of brushes for different pool surfaces, such as concrete, vinyl, or fiberglass.
- Make sure the pool water is clear, and the pump is turned off before you begin brushing.
- Starting from the top, use the brush to gently scrub the walls of the pool. Move the brush in a circular motion, using a little force to loosen any dirt, algae, or debris on the walls. Continue to brush the walls until you have covered the entire pool perimeter.
- Next, brush the pool floor in the same way, starting from one end and moving in a circular motion. Focus on areas that are frequently used, and any areas that have visible dirt or debris.
- Once you have brushed the walls and floor, turn on the pool pump and filter to help remove any loose dirt or debris from the pool.
- Finally, use a skimmer net to remove any debris that has been brushed up into the water, such as leaves or insects.
Step 08: Vacuum the Pool

Once the walls and floor are clean, it’s time to vacuum your pool. We gathered 06 steps that will make your work easier.
- Start by selecting a pool brush that is appropriate for the surface of your pool. There are different types of brushes for different pool surfaces, such as concrete, vinyl, or fiberglass.
- Make sure the pool water is clear, and the pump is turned off before you begin brushing.
- Starting from the top, use the brush to gently scrub the walls of the pool. Move the brush in a circular motion, using a little force to loosen any dirt, algae, or debris on the walls. Continue to brush the walls until you have covered the entire pool perimeter.
- Next, brush the pool floor in the same way, starting from one end and moving in a circular motion. Focus on areas that are frequently used, and any areas that have visible dirt or debris.
- Once you have brushed the walls and floor, turn on the pool pump and filter to help remove any loose dirt or debris from the pool.
- Finally, use a skimmer net to remove any debris that has been brushed up into the water, such as leaves or insects.
Step 09: Shock the Pool
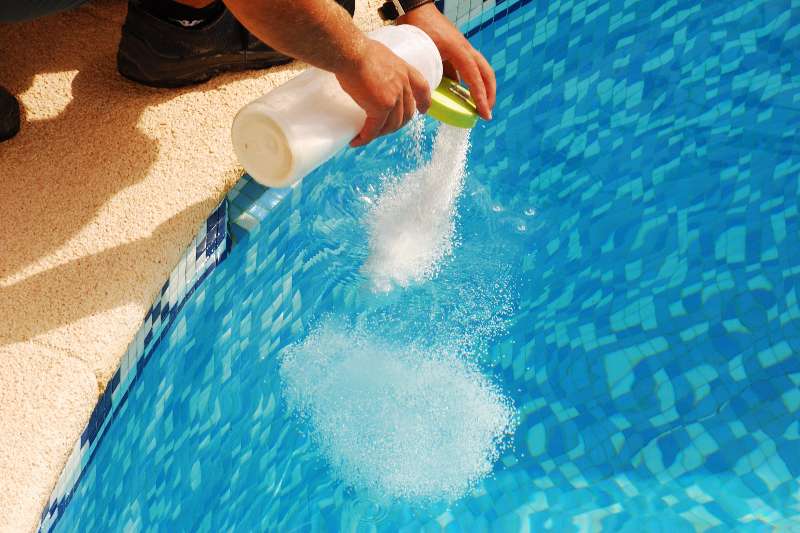
Shocking the pool after vacuuming is important. This will kill any bacteria or algae that may have accumulated in the pool during the winter months. Here are the steps to shock your pool:
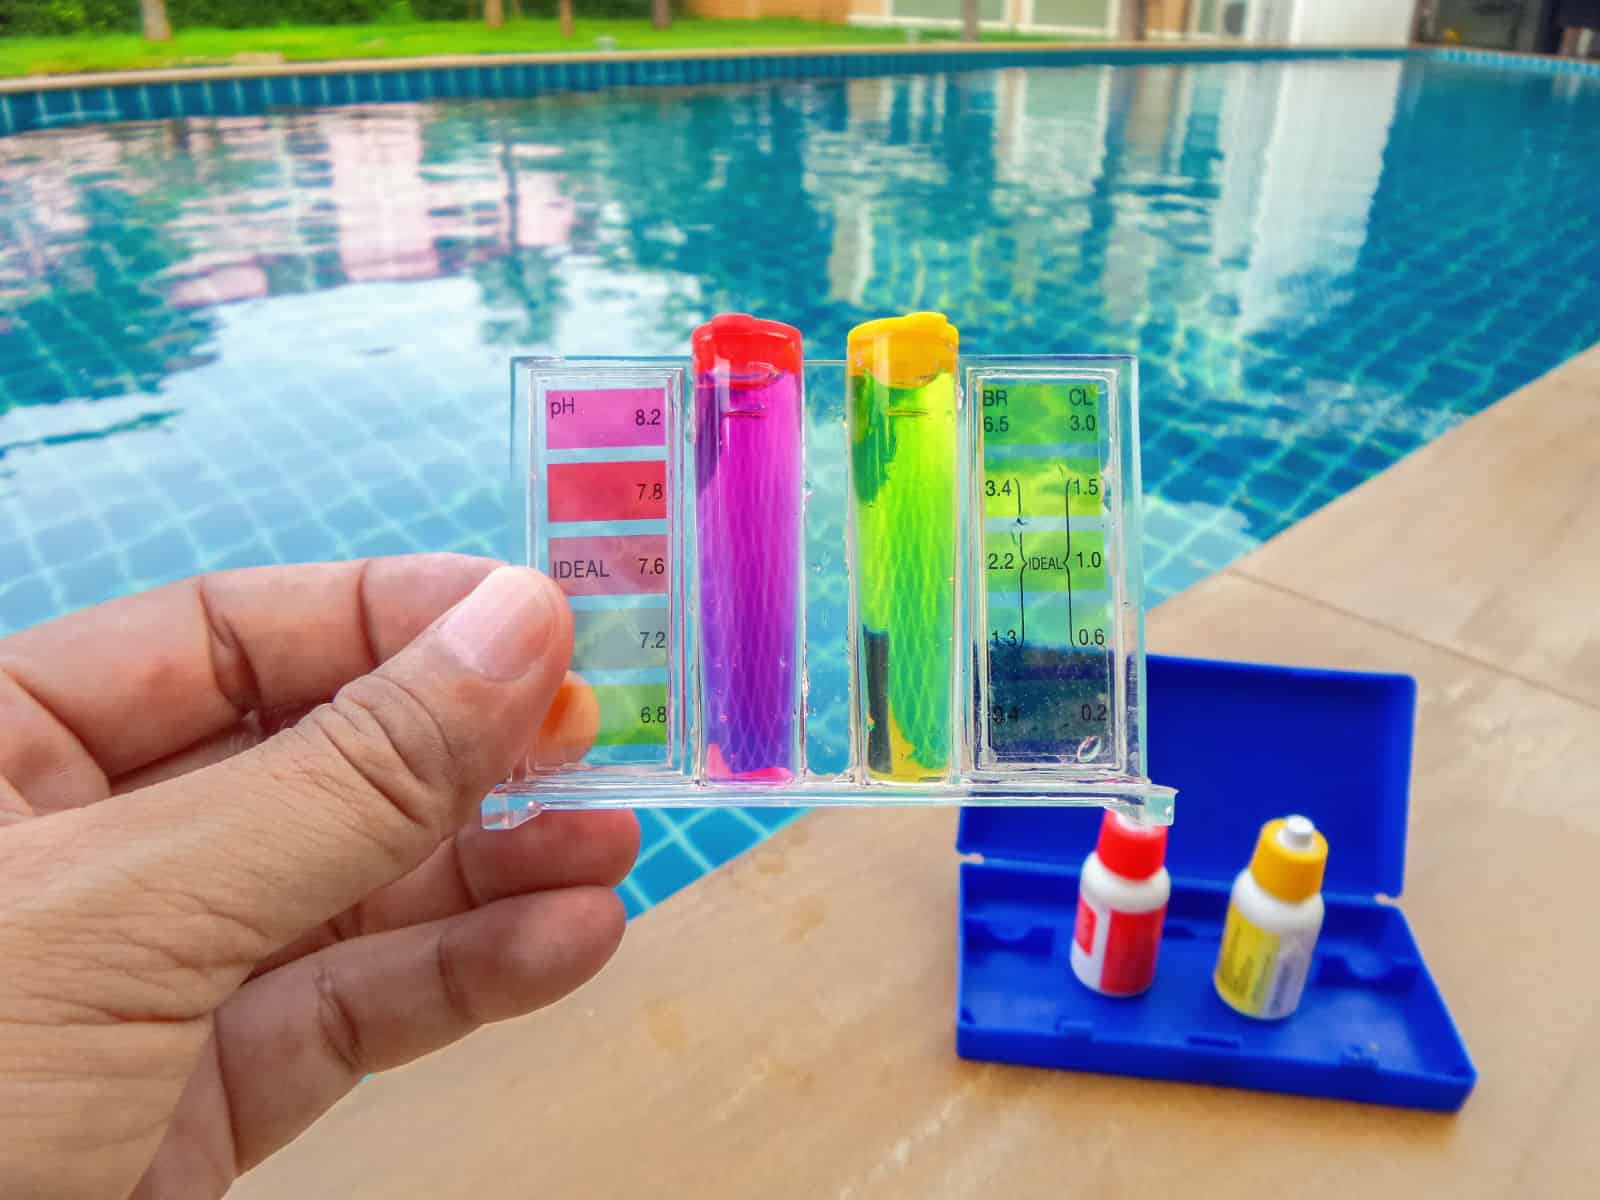
- Test the pool water using a pool test kit to determine the current levels of chlorine, pH, and alkalinity.
- Calculate the amount of shock you need to add to the pool based on the manufacturer’s instructions and the size of your pool. Be sure to wear protective clothing and follow the manufacturer’s instructions carefully.
- Turn off the pool pump and filter system before adding the shock to the pool.
- Add the shock to the pool by sprinkling it around the perimeter of the pool, making sure to distribute it evenly. It’s best to add the shock in the evening or at night when the sun is not as strong and the chlorine can work more effectively.
- Turn on the pool pump and filter system, and let it run for at least 8 hours to circulate the water and help distribute the shock evenly.
- After 8 hours, test the pool water again to ensure that the chlorine level has returned to a safe level. The water should be safe to swim in after the chlorine level has returned to a safe level.
- Run the pool pump and filter system for at least 24 hours to ensure that the shock has had time to circulate and work effectively.
Note: We recommend you shock your pool at least once a month, or more often if the pool is frequently used, after heavy rain, or if the water is cloudy or has an unusual odor. By shocking your pool, you help to ensure that the pool water is clean and safe for swimming.
Step 10: Test the Water
Again test the water to ensure that the pH and chlorine levels are balanced. Use a pool testing kit to check the levels and make any necessary adjustments. Adjust the pH and chlorine levels as necessary to ensure that the water is safe and healthy for swimming.
Besides, you can watch this practical video…
FAQs
Can I use baking soda instead of chlorine in my pool?
While baking soda and chlorine serve different purposes when it comes to pool maintenance, baking soda can be used as a supplement to your pool’s regular chlorine treatment. Baking soda can help to raise the pH level of the pool water and stabilize the alkalinity, which can help to prevent damage to the pool equipment and make the water more comfortable for swimmers.
But, baking soda should not be used as a replacement for chlorine in your pool. Chlorine is a critical component of pool maintenance, as it helps to kill bacteria and other harmful microorganisms in the water that can cause illnesses and infections. Chlorine is also essential for preventing algae growth, which can make the water cloudy, slimy, and unpleasant to swim in.
Can you swim after adding baking soda to your pool?
Yes, you can swim after adding baking soda to your pool, as it is safe for swimming. Baking soda is a commonly used pool chemical that is generally considered safe when used according to the manufacturer’s instructions.
Can you swim in a cloudy pool?
No, you can’t swim in the cloudy pool, as the cloudiness can be a sign of poor water quality that may pose a health risk. Cloudy water can be caused by a variety of factors, such as low sanitizer levels, high levels of dissolved solids, or inadequate filtration.
How long does it take for a pool to turn blue?
Most pools will turn blue within a few hours to a day after being filled with water. The blue color in a pool is typically the result of adding pool chemicals such as chlorine or bromine to the water, which can take a few hours to dissolve and distribute throughout the pool.
Conclusion
With these easy and effective steps, you’ll be able to clean and prepare your pool for a summer filled with fun and relaxation. It may seem like a daunting task, but with a little effort and patience, you’ll have a crystal-clear pool that is both safe and healthy for you and your family.